The first time I tried a mermaid braid, my living room looked like a tide pool after a storm—clips scattered like seashells, extension wefts coiled across the couch, a mist of sea-salt spray hanging in the air. The mirror leaned against the wall, catching the late-afternoon light, and for a moment I just stared at my own hair, heavy with possibility. I’d seen those dreamy, tumbling braids on summer festival photos and beachy editorials, all texture and romance and impossible length. I suspected some quiet magic was involved—perfect sea genes, maybe, or at the very least, a professional stylist. Instead, what I actually had was a slightly tangled mane, a packet of clip-in extensions, and a stubborn belief that anyone with patience and the right tricks could build their own mermaid hair from scratch.
The Allure of Mermaid Braids
There’s something deeply nostalgic about a mermaid braid. It feels like a grown-up version of the braids we wore as kids—only now they’re looser, wilder, and threaded with intention. They swing across bare shoulders on late summer nights, collect grains of salt and sand at the beach, and look just as at home paired with a linen dress as with a worn-in band tee.
Unlike a tight schoolyard plait, a true mermaid braid is all about movement and dimension. It’s imperfect on purpose. Wisps escape around the hairline, pieces billow out from the weave, and the whole thing looks like it might have been shaped by an ocean breeze instead of your own two hands. Extensions are the not-so-secret ingredient: they give you extra length to play with, more volume to pancake out, and that plush, almost otherworldly fullness that makes the braid feel like it belongs in a fairytale cove.
But the real beauty of this style isn’t just cosmetic. There’s a kind of ritual to it—the slow sectioning, the rhythm of your fingers weaving over and under, the quiet focus of watching shape emerge from chaos. It’s a small act of self-creation, intimate and tactile, and something about that feels quietly radical in a world that often rushes us past our own reflections.
Gathering Your Mermaid Toolkit
Before you even touch a brush, there’s a gentle satisfaction in laying out your tools like shells on a shoreline. Everything has its place, and the simplicity of the setup keeps the process soothing instead of stressful.
| Tool / Product | Purpose |
|---|---|
| Clip-in or tape-in extensions | Add length, thickness, and fullness to the braid. |
| Wide-tooth comb & detangling brush | Smooth out knots while keeping natural texture. |
| Texturizing or sea-salt spray | Create grip so the braid holds and looks beachy. |
| Clear elastics & bobby pins | Secure the braid discreetly and tame loose pieces. |
| Curling wand or flat iron (optional) | Add soft waves for a more organic, mermaid-like finish. |
Extensions are the heart of this project, so choose them like you’d choose a good swimming spot: thoughtfully. Human hair extensions blend most naturally, especially if you plan to curl or heat-style. Match the color not just to your roots, but to the mid-lengths and ends of your hair—that’s where the braid will show most. If your hair is highlighted or balayaged, a slightly variegated extension shade can actually look more natural, mimicking those sun-caught streaks that hair gets after a long summer.
Run your fingers through the extensions; they should feel smooth but not slippery, with a bit of natural weight. Lay them beside your own hair in good light and tilt your head, letting the strands fall together. When they disappear into each other, you’ll know you’ve got the right match.
Prepping Your Hair: Building the Ocean Bed
Mermaid braids love lived-in hair. If you’ve just washed yours, you might notice it’s almost too clean—too soft, too floaty, sliding out of elastics like it has somewhere else to be. Texture is your friend here, so think of this step as building the seabed your braid will anchor into.
Start by detangling thoroughly, beginning at the ends and working your way up, coaxing out knots rather than yanking through them. There’s a kind of patience in this that sets the tone for the whole style: slow, deliberate, almost meditative. Once your hair is smooth, mist a texturizing or sea-salt spray from mid-lengths to ends. Scrunch with your hands and let it air-dry for a few minutes, or blast it gently with a diffuser if you’re in a rush.
If your hair is naturally straight and slippery, you may want to add loose waves with a curling wand, wrapping sections away from your face and leaving the ends just slightly straighter for that undone, beach-soft bend. If your hair is already wavy or curly, you’re ahead of the game—just define what you’ve got, then let it cool and settle. The goal is not perfection; it’s texture that feels like it’s been sculpted by wind and water, not hard tools.
This is also a good moment to part your hair where you want the braid to fall. Mermaid braids look beautiful draped over one shoulder, cascading down your back, or starting crown-high and trailing low. Imagine the silhouette from a few steps away: do you want drama down your spine, or a romantic sweep across your collarbone? There’s no wrong answer, only the one that feels like you.
Placing Extensions for Maximum Mermaid Volume
This is where the quiet illusion begins. Flip on some music, sit near a window, and think of yourself more as an artist than a stylist. Extensions don’t need to be perfect; they just need to be placed with intention, following the natural curves of your head.
Start by sectioning off the bottom layer of your hair from ear to ear, clipping the rest up out of the way. Clip in your first weft horizontally, close to the nape of your neck. Feel along the scalp to make sure it’s flat and snug, not pulling. Let the next layer of hair fall, then repeat the process, stacking wefts upward in soft, rounded tiers. If you’re working with tape-ins, you’ll be “sandwiching” small pieces of your own hair between the tape tabs, creating slim, comfortable panels that move like your natural strands.
A key trick for braids: focus extra extensions in the mid-lengths—not just the lower back of your head. Place a few smaller wefts closer to where the braid will start, whether that’s just behind your ear for a side braid or slightly off-center for a dramatic crown. When you eventually pull everything into a plait, this concentrated fullness will give your braid that oh-wow thickness.
Run your hands through your hair once the extensions are in. Close your eyes. Feel for any sharp edges or clips that need shifting. Your hair should feel like one cohesive curtain, not a puzzle of separate pieces. When you toss it over your shoulder, it should swing with a believable weight—like it’s always been this way, like it grew this long every night while you slept.
Weaving the Braid: From Shoreline to Deep Water
Now comes the part that looks complicated but really isn’t once your fingers find their rhythm. You can build a mermaid braid from almost any braiding technique, but three work especially well: a classic three-strand, a loose Dutch braid, or a fishtail. Each gives a slightly different kind of magic.
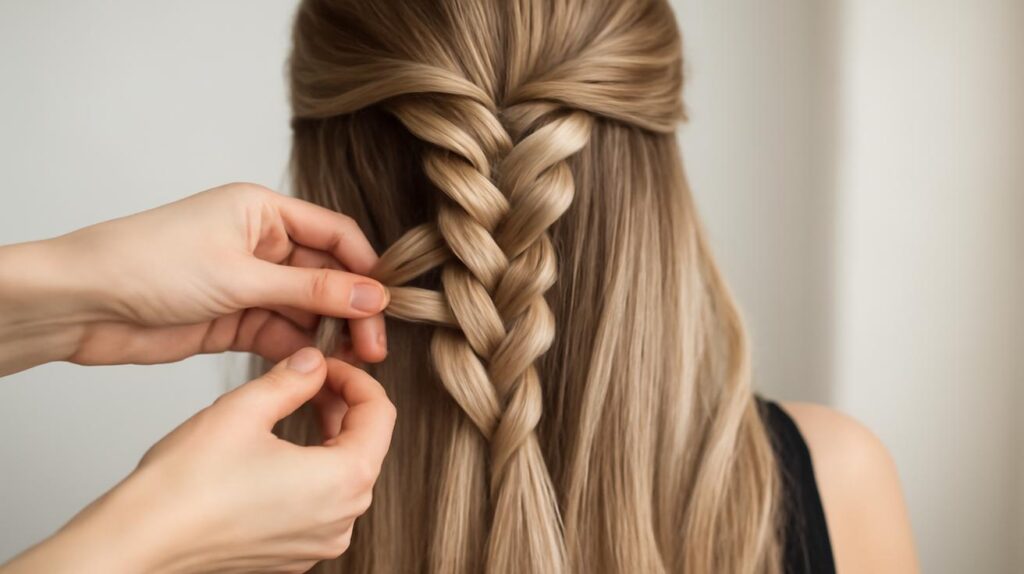
For a soft, romantic look, try this: sweep all your hair to one side, over your chosen shoulder. Divide it into three sections. Begin a loose three-strand braid, crossing each section over the middle—right over center, left over center—keeping your hands low and your tension relaxed. Don’t worry if a few pieces fall free; that’s the point.
After you’ve braided a few inches, pause and gently “pancake” the braid: starting from the top, pinch the outer edges of each loop and tug them outward, just a bit. Watch as your braid widens, flattening into those wide, shell-like ridges that make mermaid braids look so plush. The extensions will do their work here, giving you enough hair to pull without the braid falling apart.
If you crave more drama, build a Dutch braid from the crown: take three sections and cross each strand under the middle instead of over, adding new hair from the sides as you go. This will raise the braid slightly from the scalp, like a rope resting on sand, and looks especially striking when you let the lower half dissolve into a loose, tumbling fishtail or three-strand.
There’s a moment, somewhere halfway down, when the braid starts to take on a life of its own. You’ll see it in the mirror and feel it under your fingers—suddenly you’re not just braiding hair; you’re shaping something that feels almost aquatic, like captured current. When you reach the end, secure it with a clear elastic, then go back and keep pancaking, softening, loosening until it looks more like a tide-sculpted rope than a tight rope of hair.
Detailing and Texture: The Mermaid’s Signature
The difference between a “pretty braid” and a true mermaid braid lies in those last, deliberate, imperfect touches. This is the part where you break the rules a little, on purpose.
Start near your face and gently pull a few fine pieces free to frame your cheeks and jawline. If those strands are stubbornly straight, wrap them loosely around a curling wand for just a couple of seconds to give them a soft, sea-spray bend. Mist them with a tiny bit of texturizing spray and scrunch upward, so they don’t fall like perfect ribbons but like wind-tossed wisps.
Next, trace down the braid, looking for symmetry to disrupt. If one side looks too neat, tug a loop or two a bit farther. If the end is too skinny, pull at the sections above it to create that coveted taper—full at the top, narrowing down like a wave breaking into foam. Tuck any exposed wefts or clips back into the braid with a bobby pin, hiding them like secrets under the surface.
A light mist of flexible-hold hairspray will help everything stay put without freezing it into a helmet. You want movement—strands that sway when you walk, loops that shift slightly in the breeze, texture that catches the light like the ripples of a shallow tide pool.
Making Mermaid Braids Your Own
Once you’ve mastered the basic technique, mermaid braids become less of a hairstyle and more of a language you can speak in different dialects. Each variation tells a slightly different story.
On mornings when you’re craving simplicity, a single loose side-braid, born from just a few added extensions, can make a plain t-shirt and jeans feel intentional. For evenings, weave in slender ribbons, sea-colored threads, or tiny sprigs of baby’s breath. Let them peek out only here and there, like treasures half-buried in sand.
If your hair is naturally curly, lean into it—don’t force it straight beforehand. Create your braid in sections that honor your curl pattern, letting halo curls escape and coil around your face. For coily and kinky textures, mermaid braids take on a powerful, sculptural beauty: use pre-textured extensions or braiding hair, then create oversized, stretched plaits that you can pancake into dramatic, cloudlike braids. The idea isn’t to mimic ocean waves literally, but to channel that feeling of expansiveness and freedom.
You can also play with placement: twin mermaid braids for a festival day, a crown braid that loops around your head like a sea nymph’s coronet, or a half-up style where the top section is braided and the bottom falls in loose waves. The extensions give you room to experiment without worrying about whether your natural hair alone can carry the drama.
Most importantly, notice how the process feels as much as how it looks. The tug of sections between your fingers. The slight weight of the finished braid resting against your neck. The way you unconsciously straighten your shoulders when you catch sight of yourself, braid swinging like a talisman. Styles like this are small, daily invitations to inhabit your body a little more fully—to decorate the everyday.
Frequently Asked Questions About Mermaid Braids with Extensions
How long does my hair need to be for a mermaid braid?
Shoulder-length hair is usually enough, especially with extensions. The extensions provide extra length and thickness, so as long as you can gather your own hair into a braid, you can build from there.
Are clip-in or tape-in extensions better for mermaid braids?
For occasional styles, clip-ins are ideal: they’re quick to install and remove. For frequent braiding and a more seamless blend, tape-ins feel lighter and more natural day-to-day. Both can work beautifully; it depends on how often you plan to wear them.
Will the extensions show in the braid?
If you place them thoughtfully—slightly below where the braid begins, and layered with enough of your own hair on top—they should disappear into the style. If a clip or tape tab peeks through, you can hide it within a braid loop or secure it under a small section with a bobby pin.
Can I do a mermaid braid on very fine hair?
Yes. In fact, fine hair benefits enormously from extensions and texturizing spray. Use lighter, thinner wefts so they don’t feel heavy, and focus on lots of gentle pancaking to create the illusion of fullness.
How do I keep my mermaid braid from falling apart?
Start with textured hair (not freshly washed), use a good texturizing or sea-salt spray, and avoid pulling the braid too loose near the elastic. Secure with a strong clear band, and add a light flexible-hold hairspray over the finished style.
Can I sleep in a mermaid braid with extensions?
If you’re using clip-ins, it’s best to remove them before bed to avoid tangling and tension on your scalp. Tape-ins are designed for longer wear, but loosely tying the braid with a soft scrunchie and sleeping on a silk pillowcase can help keep everything smoother.
Do I have to curl my hair first?
No. Waves and curls enhance the textured, ocean-inspired feel, but straight hair can look striking too, especially in a sleek mermaid braid. If you skip the heat, make sure to use a good texturizing spray so the braid has enough grip.
How long does it take to do a mermaid braid with extensions?
Once you’re comfortable, expect around 20–30 minutes: a few minutes for prep and texture, a few for extensions, and the rest for braiding and detailing. The first time might take longer, but your fingers learn faster than you’d think.
Can I add accessories to my mermaid braid?
Absolutely. Try tiny hair rings, pearl pins, thin ribbons, or small flowers. Place them sparingly so they look like treasures caught in the braid, not decorations crowded onto it.
Are mermaid braids damaging to my hair?
When done gently, they’re quite protective—your ends are tucked away and less exposed. Just avoid braiding too tight, take breaks from extensions if your scalp feels sore, and detangle slowly when taking the style down. With a bit of care, your hair can emerge from the waves just as healthy as it went in.